Fractal Flow

Fractal Flow is my largest programming project so far; here’s a little about it:

Early days

I started Fractal Flow on January 12th 2022, after a few months of learning and tinkering with the Windows Presentation Foundation in my Computer Science class. The application was to be my coursework, which makes up 20% of the AQA A-level Computer Science grade.

January was not usually the month in which my college starts pupils on the NEA (Non-Examination Assessment), however my teacher had offered that I start early due to my prior knowledge in programming. I snatched the offer, hoping I could turn this opportunity to spend hours of my time programming into something more than just my A-level coursework – I wanted to create a piece of professional software that could persist as a gem in my portfolio for years to come.

What is it?

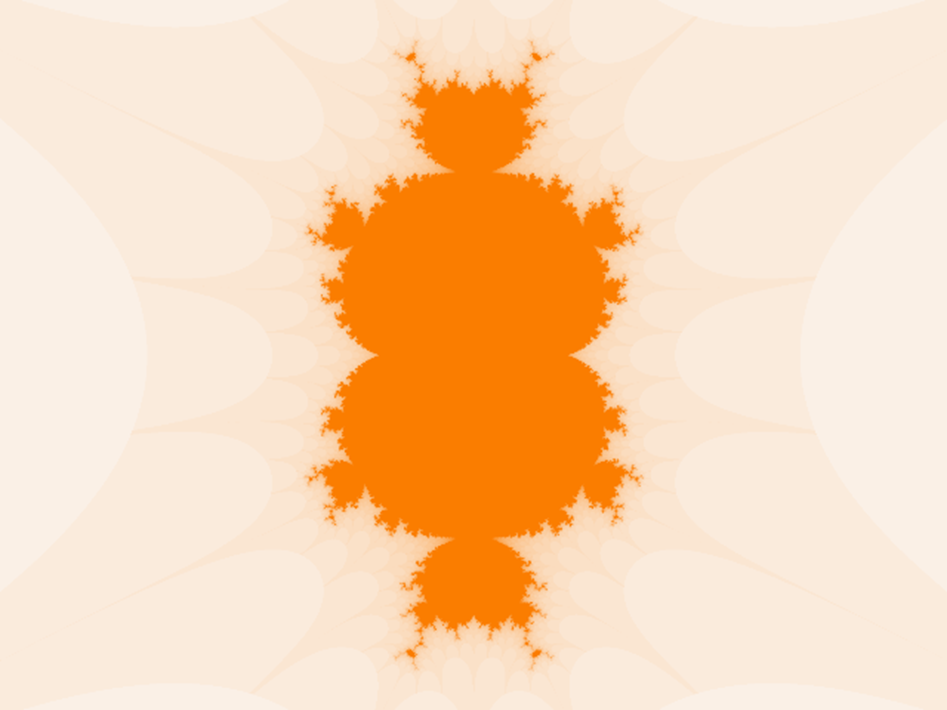
Fractal Flow is a fractal generator. Its job is to generate and export images of fractals, geometric shapes which contain a high level of detail when zooming in and often contain entire versions of themselves.

One of the most famous fractals is the Mandelbrot Set, first visualised by Benoit Mandelbrot in 1980. This infinitely detailed object is constructed over the complex plane with the formula z^2 + c, a deceptively simple operation for the immense complexity which is generated.
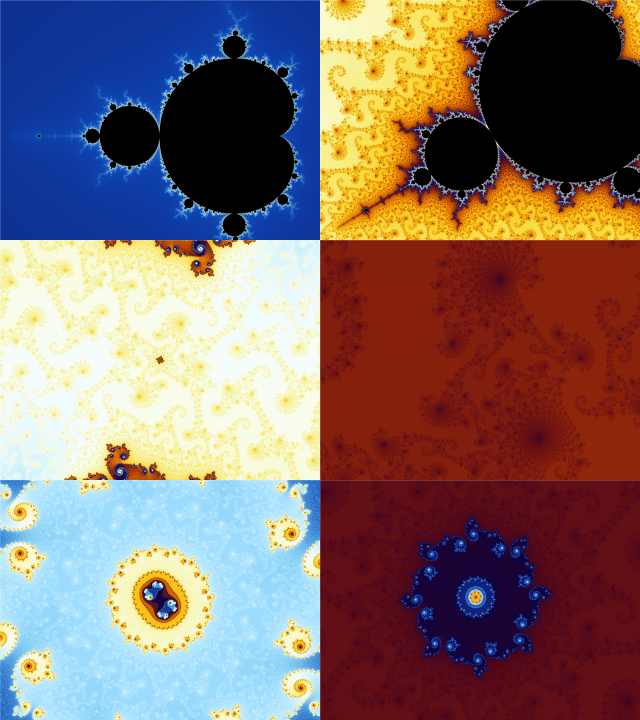
Mandelbrot set zoom

z^2 + c is but one of an infinite set of formulae that can be chosen to create fractals on the complex plane. These unlimited possibilities is what Fractal Flow is designed to explore. The software is fully focused on creating fractals from any formula the user can come up with – doing so with incredible performance.

Mission

From the beginning I was laser focussed on creating a product that was not only intuitive and visually attractive, but also competently engineered behind the scenes. The first step to achieving this was abandoning what was expected of me: using WinForms. I taught myself WPF (Windows Presentation Foundation) and furthermore how to use it with a professional approach. MVVM (Model View View Model) allowed for a proper separation between the user interface and the business logic and thus opened the door to code reusability.

The MVVM approach to applications
Designing the UI

I was not happy with leaving my app with a bog-standard UI. Noticing that all the fractal generators I had tried had very tired visuals, I set about changing the expectation for how such software could look by creating a sleek, modern user interface.

This was my first time using the brilliant website Figma. I had a lot of fun designing the pages and selecting iconography and typefaces.

Rendering Kernel

The crown jewel of the application is the rendering technique I developed for it. Rather than running the computationally intense tasks in C# on the CPU, Fractal Flow hands rendering to the GPU. This allows for an enormous increase in performance (over 1000x faster in my tests).

The GPU is faster than the CPU in this field because it allows the concurrent execution of hundreds of calculations simultaneously. The colour of each pixel in these fractal images are completely independent of the other pixels in the image, so they can be treated as completely different processes to each other. This makes parallelisation really easy as each pixel can be sent as a separate job to the GPU.

To harness the power of the GPU in WPF, I used a library which provided access to OpenCL (Open Computing Language). This allowed me to provided a small piece of C code called a kernel that is to be run on the GPU. I could specify how many of these kernels are sent to the GPU and an array of arguments to be distributed between them.

This is where the clever part comes in. From the iterative formula the user specifies to generate their fractal, a line of C code representing that operation is generated. This is then implanted into the kernel to create a new program, specifically programmed to render the fractal. This approach is called metaprogramming, a technique where code writes itself.

I used this approach for technical limitations (my understanding was that using the complex number libraries in the OpenCL library kernel was unsupported so I resorted to a series of macros for my complex operations), and also because I believed that it would reap even greater computational performance over the CPU.

Diagram of render pipeline
Proprietary Formula Parser

I created my own mathematical formula parser for this application. This was not a necessary step – reinventing the wheel for such a common process is not good practice. Regardless I made a homemade parser because: 1. It was a valuable learning process and 2. It would give me marks in my NEA 3. It allowed me total control over how the parser worked.

Developing this algorithm taught me about Dijkstra‘s Shunting Yard Algorithm (yes the same Dijkstra who invented the route finding algorithm), which converted an expression in infix notation to the Reverse Polish Notation required for execution by computers.

I also made sure my algorithm allowed for relatively natural expression. For instance it accepted notation such as “5z“, the terse form of “5 \times z“. I realised I could summarise token adjacency behaviour in a table:

Current State

I left Fractal Flow in a state I was relatively happy with, however there were still many features I envisioned for the application that have not made it to the application yet. For instance I initially wanted the application to be able to produce zooming videos, and have a multitude of different colouring algorithms as found in other fractal generators.

It was investigating colouring algorithms where I found a large problem with the code of Fractal Flow – an issue so large that it led to a downfall in motivation to develop the project. The problem was that many colouring algorithms require information *other* than simply the number of iterations each pixels took before it triggered the bail, such as the distance the iteration that triggered the bail “jumped” from the prior position. Implementing the inclusion of this information would require a large redesign of the render pipeline and considerable thought over how to architect a memory-efficient system.

I learnt an important lesson in discovering this flaw: to always research thoroughly absolutely everything my system might be implementing on top of what I already know it must.

There are also a few areas of the program that are unnecessary or artificially shoe-horned into the designed, with the purpose of hitting more targets on the NEA mark scheme. For example the formula parser discussed earlier, and the use of an SQL database to store fractal definition objects (I think simply storing them in files would be more reasonable).

Fractal Flow is currently over 10000 lines with over 20 classes.


GitHub README

FractalFlow

WIP – This is my A-level (Junior/Senior year equivalent) Computer Science coursework as submitted. REMEBER TO MAKE BRANCH IF WORKING ON FURTHER

Fractal Flow is a next generation application for rendering fractal images over the complex plane, with a focus on generating custom user-defined fractals.

<p align=“center”> <img src=“https://github.com/ProgramPhantom/FractalFlow/assets/49105496/bea77f82-704e-496d-a2e5-73ba33bd892d” /> </p>

Mission:

Fractal Flow aims to streamline and accelerate the process of exploring new fractal objects – beyond the Mandelbrot set. Fractal Flow combines a blazing fast rendering kernel with a UI whioh empowers rapid iteration and generation of ideas.

Architecture:

Implementation detail:

  • Fractal Flow uses a meta-programming approach to achieve superior performance. The application generates an OpenCL Kernel specifically for the formula specified, which is ran on the GPU.
  • The application currently also includes a renderer for the CPU, however it is highly unoptimised and unfeasibly slow, and thus will no longer be maintained.

Examples

User Interface

Tan

Features

  • CPU & GPU rendering capabilities
  • Create a custom fractal by specifying a formula
  • Natural math expression achieved through proprietary formula parser
  • Two types of fractal colouring algorithm
  • Specify iterations, bail value and region on the complex plane
  • Save and load proprietary .frac fractal definition file
  • Save fractal image as .png
  • Random colours button
  • Console Window
  • Fractal definition objects saved in SQL database

Started 12th Jan 2022

Song of the article

Mandelbrot Set Python

First let me get out the way the glaring problem of Python being a terrible language to make a Mandelbrot Set generator in. Mandelbrot Generators need speed to make the best possible images with the highest resolutions. Python, compared to a language such as C – which would be a much better language to program this project – is incredibly, incredibly slow to run. This is due to multiple things, mainly Python being an interpreted language meaning each line of code is compiled line as the program is executed, while a compiled language like C is converted into a binary file before runtime. The reason I used Python is because 1. I am a million times more competent with Python than any other programming language, and 2. Sufficient quality images can be acquired in Python in a relatively reasonable amount of time; good enough for this little experiment.

The Mandelbrot Set

The Mandelbrot Set is a set of numbers. A list of numbers which satisfy one rule. First, we must take the entire set of numbers, which in this case is a small area on the complex plain, with real numbers going along the x axis and imaginary numbers going up the y axis.

Complex numbers: the complex plane, addition and subtraction

If you throw a dart onto the complex plain, the position that dart landed can be described by taking it’s position on the x dimension and y dimension and combining them together, this is a complex number; a number combining a real part and an imaginary part.

A Mandelbrot Set generator takes every position in this plain (every complex number), with certain bounds and a set level of fidelity, and applies this formula to it.

    \[Z_{n+1} = Z_n^2 + c\]

What this does is takes the number 0, square it, and add the current complex number to it. Then it does this again, but instead of Z being 0, Z is now the number which the last calculation created. This is repeated many times and this iteration will do one of two things. First, and true for basically all complex numbers save a few around 1 to 2 x or y on the plain the iteration will blow up as it is squared over and over again, so it will go off to infinity. However, due to the nature of mathematics, there are some numbers which do not spiral off into infinity, instead doing something far more remarkable. These numbers make a series of calculations which turn into a loop, they stabilise out into a repeated pattern of numbers that never expand to infinity. Complex numbers which do this are in the Mandelbrot Set.

So, if you repeat this process over and over again for many complex numbers you create a group of complex numbers which are in the set. But a list of numbers is not very interesting. The magic happens when you give the numbers a colour, most commonly black, and place them back onto the complex plain:

The Mandelbrot Set

A fractal: a beautiful shape with infinite complexity buried in the reality of the universe.

In addition to simply colouring the numbers that are in the set black, pixels can also be coloured by taking the number of iterations it took the program before the complex number began to increase to infinity, essentially a measurement of how “stable” that position is.

By simply subtracting the red and green values of the pixel by the iteration count multiplied by some arbitrary constant to give it more of an effect, a blue colouration can be given to the space around the set:

Going even further than this, a spectrum of colours can be mapped to the number of iterations, creating some brilliantly colourful sets.

Mandelbrot Set - How to plot the Mandelbrot set
I have not added this feature to my code yet

The Mandelbrot set is just one of many fractals which can be made this way, playing around with the formula can yield some incredible results.

Z3

When you increase the power, the number of “bulbs” increases.

This website

I created this website to display the many programming/electronics projects I have done over the last 3 years.

Here is how I made it.

Inspiration

Going into the project, I already had a little experience setting up websites. I had made my own HTML website in the past and had explored using Jekyll themes combined with Github Pages to create a nice little website. The experience making the Jekyll website was admittedly quite painful at times due to my lack of understanding in the realm of web design and full-stack development.

WordPress

Inspiration

My aim for this time round was to make a simple website where I could easily create posts to create a record of projects I do in my free time, while most importantly, not becoming the disorganised mess resembling my last website. By this point, I had heard of WordPress, and was not really sure what it did or how to use it. I did know however that it was used to create exactly what I wanted on this website – something I stumbled across from YouTube.

So I began researching WordPress, discovering its two types: wordpress.org and wordpress.com. I was determined however to spend nothing on this website, so I strayed away from wordpress.com where almost everything is hidden behind a paywall.

Setup

I already had an old computer lying around so I wanted to use that as the server for the website rather than paying for third party webhosting (despite it costing very little to set up a small site). Unfortunately the population of helpful WordPress tutorials online seemed to be predominantly aimed at the paying version of WordPress, which didn’t speed things up. I did find this tutorial however, which was brilliant to get me set up but did create quite a few problems later along the line due to it being quite old and out of date.

After running into a few problems where I foolishly decided to change tutorials and installed something which confused my database software, I managed to get onto the WordPress dashboard. I began to explore and was really impressed with the ease of use of the software, and how everything was organised very well – something my last website was dearly missing.

Themes

WordPress Dashboard

Far too much time was spent on the Themes page, where I scrolled for ages looking for the perfect layout for my website. After trying a few, I began to make a few realisations. Firstly, it seemed all the themes I wanted to use where created by 3rd party companies which all had links to their own websites presenting new paywalls to unlock the full suite of functionality on their template. Another thing which bugged me was sometimes when activating a new template, an entire library of plugins where installed to satisfy the template’s requirements, making me feel even more overwhelmed by the enormous amount of pages and configuration on the WordPress dashboard.

For this reason, I decided to pick the inbuilt “Twenty Nineteen” WordPress theme, the exact same as the website previously mentioned. I really liked this theme due to its simplicity and lack of hidden paywalls due to being an inbuilt theme. Admittedly, this theme is probably very overused so to make myself a bit more unique I will undoubtedly change it in the future.

Domain

Now to buy a domain – the only thing I was forced to spend money on in this entire project. I bought the domain henrytechblog.com domain from Google Domains for £10/year and connected it up to my IP.

Let’s Encrypt

HTTPS

My website was nearly ready to go but there was one annoying thing I wanted to fix and that was the site was using the HTTP protocol rather than the far, far more secure HTTPS protocol. This meant my browser displayed a little “Not Secure” icon next to the URL – not very professional.

Going into this, I was under the impression all I had to do was flip a switch on my Apache web server, and it would start to use the safer protocol. This, it turned out, was very far from the truth. I immediately discovered that to make your site use HTTPS, you needed a TLS certificate, in order for browsers to guarantee the site was not faking it’s use of HTTPS. One of these certificates can cost from £25 – 200, a sum I certainly was not ready to pay.

Due to HTTPS effecting sites ranking in search engines, this creates an unhealthy bias against small companies which cannot afford to pay for these certificates. Enter Let’s Encrypt, a non-profit company set up to tackle this problem by basically just giving out free TLS certificates.

From there I was pointed to Certbot, an ACME client which uses Let’s Encrypt’s services to automatically applies a TLS certificate to your server, and keep it up to date. The process after that was satisfyingly simple, all I had to do was follow the tutorial on Certbot’s website, and after some brief confusion where I forgot to change my port forward to use the 443 port (default for HTTPS), I had my website using the new web protocol.

Conclusion

I am now in the process of creating articles for all the projects I have done in the past. Now, thanks to the ease of use of WordPress, I will be able to make pages on my website for the projects I do, as I do them, so they can go into more depth and detail. The future vision of this website is a platform for me to upload my experiences so they are easily accessible, and easy to give to potential jobs or universities as evidence of experience in certain areas.

Thanks for reading

Peanut Butter Simulator

Intro

I started this project back in the first national lockdown, a period of time where I was off school for around 6 months. The majority of my days were spent waking up, sitting at my computer, then going back to bed, with the occasional visit to the kitchen for peanut butter on toast. This allowed me an incredible amount of time to do things such as program, and this game is one of the things which came out of that.

I programmed Peanut Butter Simulator over the course of about a week during my holiday from start to finish, and worked at it for so long each day it practically turned into a full time job.

Idea for the game

At first my idea was to make an idle game virus-related (inspired by the ongoing global pandemic), where the gamer would evolve and grow their virus to become stronger and more lethal, sort of like the game Plague Inc. I quickly realised however that it probably was not the best time to create a game about killing as many people as possible with a virus while such atrocities where ravishing the plant. Thus Peanut Butter Simulator was born.

Inspired by my worryingly high consumption of peanut butter during those lockdown days, Peanut Butter Simulator would be a light-hearted and humorous idle/clicker game with the basic premise being: click the jar of peanut butter – get money – upgrade peanut butter.

The main inspiration for the game was Egg Inc. A mobile app where start by running a humble chicken farm, until egg technology grows and the world discovers new, powerful eggs which also happen to be worth more, allowing to grow your farm to insane levels. Eggs included in Egg Inc. consist of: Graviton Egg, Terraform Egg, Quantum Egg, etc.

I also wanted to be a clicker game, meaning you have to click on the graphic in the centre of the screen to get money.

How I made the game

Peanut Butter Simulator was created using the Python programming language, and a videogame creation module call Pygame, which I had some prior experience with, but this was to be my biggest game by far.

Feature Breakdown

Here are the features I implemented into the game.

front page

When you first open the game’s .exe file, you will be greeted by this very slapdash welcome screen, where you are prompted to input a username (the use of which will be detailed later).

Basic Peanut Butter

You start the game with the least valuable peanut butter, regular peanut butter. There are 3 main variables which determine how much money you make in the game: Price Each (PE), Batch Size (BS) and Batch Rate (BR). In addition, there is a variable holding Inventory (the amount of jars of Peanut Butters you have produced), and a money variable.

  • Price Each – the amount of money you can sell each individual peanut butter for
  • Batch Size – the number of jars of peanut butter you get for each click of the jar or when the batch rate ticks
  • Batch Rate – passive peanut butter gain, you gain BS every BR. This rate is visually represented by the green progress bar below the jar.

To gain inventory, click the jar or wait to passively gain a batch. To gain money from your inventory, click the red button at the bottom of the window, where it displays the amount of money you will gain (calculated with PE * Inventory). Money is then displayed above the sell button.

The three main variables for the making money can be upgraded with the three buttons above the money reading.

The cost and increase for each time you upgrade is calculated as follows:

Price: Calculated buy multiplying the last price by 4, apart from every 3rd upgrade, which is * 5

Increase: calculated by running a Fibonacci algorithm on the starting value.

There was very little mathematical testing on how these formulas work together to make the game not take days to complete and equally not spiral off too quickly thus making the game take too little time to complete. I found while creating this game that this goldilocks zone where the numbers do not blow up is quite a hard thing to create, and I admittedly did not spend very long fine tuning it, something I should definitely do if I were to go back to it.

Upgrading peanut butter

The amount of money needed to upgrade your peanut butter to the next level is displayed below the main peanut butter name, in this case, being £100k. Once you have enough money to upgrade to the next level an upgrade button will appear in the top right of the jar.

Clicks / second panel
CPS

This fun little feature shows how many times you are clicking the jar every second, your record for how many times you have clicked the jar, and the total times you have clicked the jar.

Tune player
Media Player

A random little extra I added to the project near the end. This feature plays some of my favourite video game and film music from over the years so my friends could bop out to a bit of Skyrim’s Dragonborn while playing Peanut Butter Sim. Comes with a pause and play button, a skip track button and a volume slider.

Peanut Butter Simulator Lore
Lore

A little I icon next to the name of the peanut butter leads to a screen with a bunch of text on, depicting the back story of the universe in which you are running your peanut butter business. The idea was to create one of these stories for each of the peanut butters in the game, creating a rich story, but I only ever did the first few.

Global Leader Board
Leaderboard

Another feature in the game is the global leader board. So my mates could compare each other’s progress in the game, I connected the game up to a server I ran off my PC, which collected and distributed all the users money data, displaying it to everyone playing the game in a ranking, using the username system described earlier. Unfortunately I cannot show the leader board screen as that would require setting up the server again which I’m not doing right now.

Game Save

When you exit the game, a very simple save game feature is ran, where a dictionary is dumped into a text file including the level of all your upgrades, your money etc. The eval() function is then ran when the game is started again to restore the game to it’s previous state. This is a very insecure way of doing this and my friends very quickly figured out they could easily edit the text file to give themselves as much money as they wanted.

.py to .exe

Finally, I used a piece of software to bundle my code and modules up into a nice little .exe file and created an installer so I could stick my game on my google drive and distribute to friends.